Roof failure rarely happens at a convenient time. A severe storm tears off shingles overnight. A fallen tree limb punctures the roof. Aging materials finally give way under prolonged rain. When this happens, interior water damage can escalate quickly—sometimes within minutes.
Once water enters a home, it doesn’t simply drip straight down. It spreads across roof decking, follows framing, soaks insulation, and pools above ceilings and walls before showing visible signs. By the time a stain appears, damage is already spreading.
This guide explains how to prevent interior water damage after roof failure, even when permanent repairs cannot happen immediately. The goal is simple: stop incoming water, control interior exposure, dry affected areas fast, and prevent secondary damage like mold and material deterioration. For many homeowners and property managers, temporary roof protection—especially roof tarping—is the most effective first line of defense.
Safety Comes First Before Any Damage Control
Before addressing the leak itself, safety must take priority. Roof failure combined with water intrusion creates risks that are easy to underestimate.
Immediate safety checks
- Keep people and pets away from the affected area.
- If water is near light fixtures, outlets, or appliances, shut off power to those circuits.
- Avoid standing beneath sagging or bulging ceilings.
- Never climb onto a roof during high winds, heavy rain, or lightning.
If the structure appears unstable, or if electrical hazards are present, pause mitigation efforts and contact emergency services or professionals.
Why Interior Water Damage Spreads Faster Than Expected
Many homeowners focus on the visible drip, but roof leaks rarely behave predictably. Water entering through damaged shingles or exposed decking often travels laterally along framing members before dripping inside.
Common hidden pathways include:
- Rafters and trusses
- Attic insulation
- Ceiling drywall seams
- Wall cavities
- HVAC ductwork
This is why a small roof opening can cause widespread interior damage if not addressed quickly.
Step One: Stop the Water at the Roof Level
The most effective way to prevent interior water damage is to stop new water from entering the structure. Interior containment helps, but it does not prevent ongoing saturation of framing and insulation.
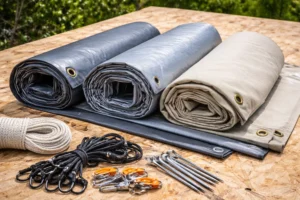
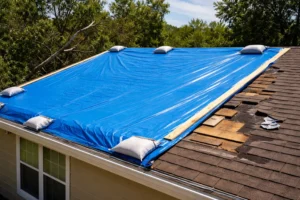
Temporary roof tarping as an emergency solution
When immediate roof repair is not possible, roof tarping provides critical temporary protection. A properly installed tarp can:
- Block rain and wind-driven moisture
- Protect exposed roof decking and underlayment
- Prevent additional interior damage
- Buy time until permanent repairs are completed
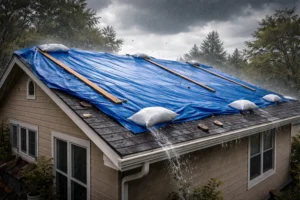
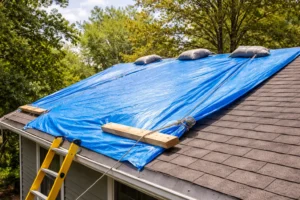
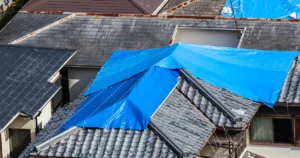
Roof tarping is widely used after storms, fallen trees, and structural failures because it works when done correctly.
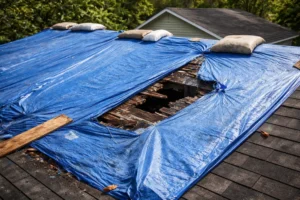
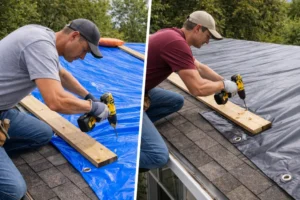
Key principles of effective roof tarping
- The tarp must extend several feet beyond the damaged area in all directions.
- It should be installed so water flows over the tarp, not underneath it.
- The tarp must be tensioned to prevent pooling.
- Edges must be securely fastened to resist wind uplift.
Improperly installed tarps can fail quickly, allowing water to re-enter and sometimes worsening the problem.
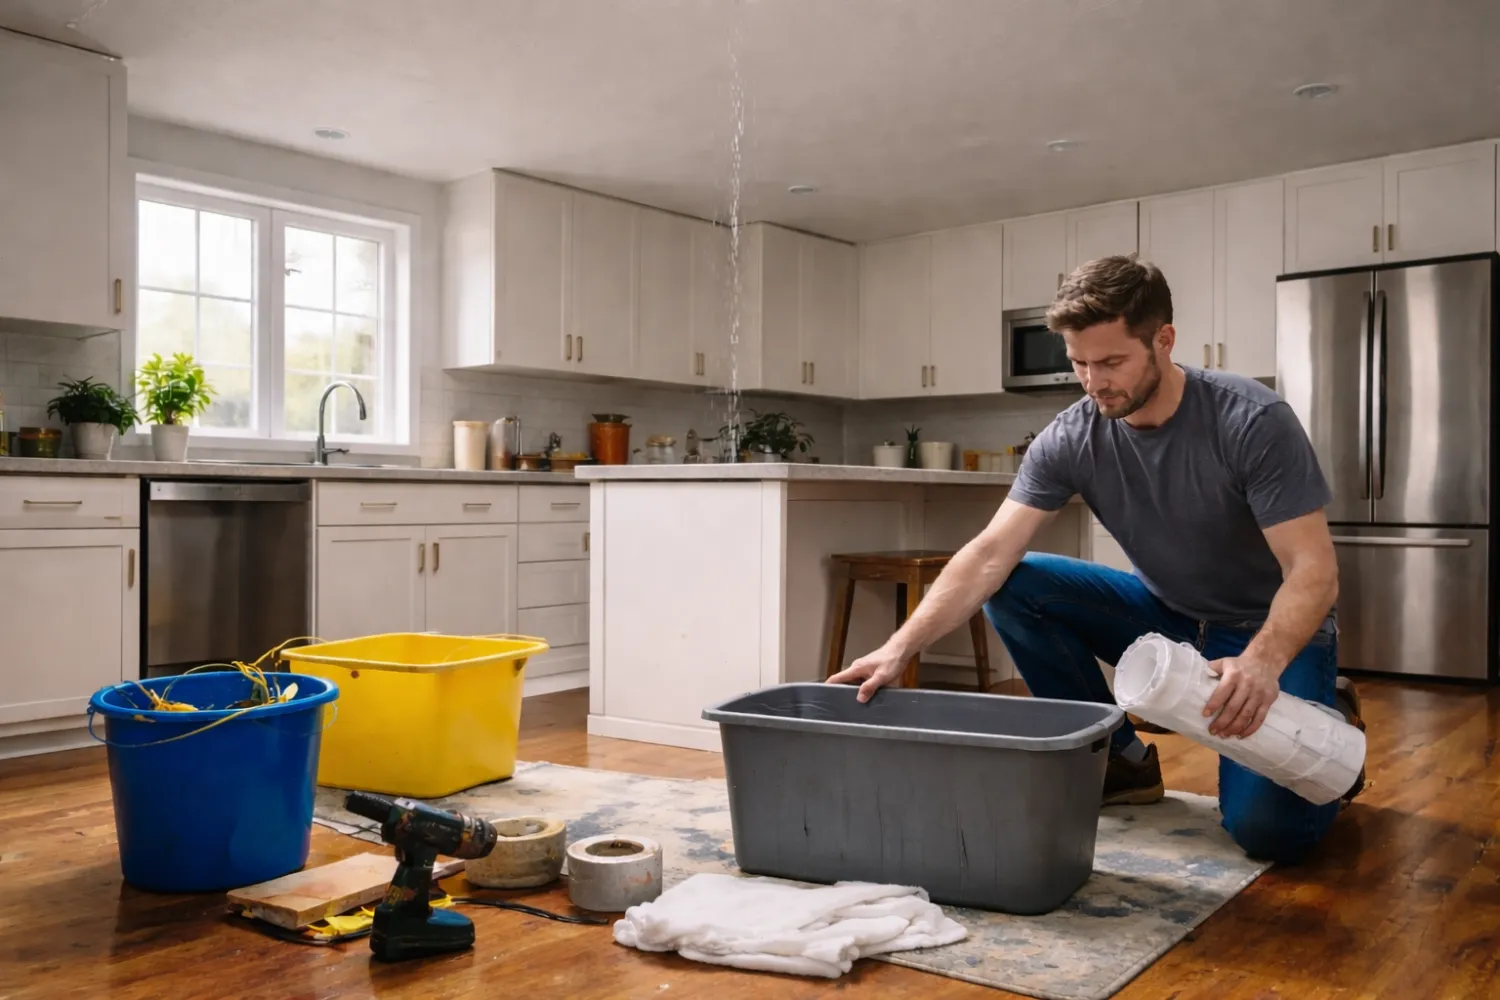
Step Two: Control Interior Water Immediately
Even with exterior protection underway, water already inside the structure must be managed to limit damage.
Containment strategies
- Place buckets or containers under active leaks.
- Lay plastic sheeting beneath containers to protect flooring.
- Use towels to absorb splash and overflow.
- Redirect dripping water into a single collection point when possible.
Flooring protection
Interior flooring materials are highly vulnerable:
- Hardwood floors can warp, cup, and stain.
- Laminate and engineered flooring swells at seams.
- Carpet padding retains moisture and encourages mold growth.
Move rugs away from wet areas and elevate furniture legs using blocks or plastic barriers to prevent absorption.
Managing Ceiling Water Safely
Water trapped above drywall ceilings creates pressure that can lead to sudden collapse.
If a ceiling begins to bulge:
- Place a bucket beneath the lowest point.
- Wearing eye protection, carefully puncture a small hole to release water.
This should only be done if the area is stable. Large or severely sagging sections should be handled by professionals to avoid injury.
Step Three: Protect Belongings and Interior Contents
Personal belongings often suffer the greatest loss during water intrusion.
Priority items to move
- Electronics and power strips
- Documents, photos, and artwork
- Upholstered furniture
- Books and textiles
Use plastic bins or bags and elevate items off the floor. When covering furniture, drape plastic loosely rather than sealing it tightly against wet fabric to avoid trapping moisture.
Step Four: Drying Begins Immediately
Preventing mold and material degradation depends on how quickly moisture is removed.
Effective drying techniques
- Use fans to move air across wet surfaces.
- Run dehumidifiers continuously.
- Open windows only if outdoor humidity is lower than indoors.
- Avoid directing airflow directly into wall cavities without proper assessment.
Porous materials such as insulation and carpet padding often need removal if heavily saturated, as they retain moisture long after surfaces appear dry.
Hidden Damage Zones to Inspect
Even after visible water is controlled, moisture may remain hidden.
Check:
- Attics for wet decking or insulation
- Wall corners for bubbling paint or softness
- Baseboards for swelling
- Light fixtures for moisture accumulation
- HVAC vents for water intrusion
Persistent musty odors are often an early indicator of hidden moisture.
Documentation for Insurance and Repairs
While emergency mitigation should never be delayed for paperwork, documentation is essential.
What to record
- Roof damage (from a safe vantage point)
- Interior water damage
- Wet or damaged personal items
- Temporary mitigation measures such as tarps and drying equipment
Keep receipts for emergency supplies, including tarps, lumber, fasteners, and equipment rentals.
Authoritative Guidance on Water Damage Response
Federal and educational resources consistently emphasize the importance of rapid water control and drying.
In addition, Wikipedia’s overview of water damage explains how prolonged moisture exposure affects building materials, insulation, and interior finishes. It highlights why delaying mitigation after roof failure often leads to compounded repair costs.
When to Call a Water Damage Restoration Professional
Some situations exceed safe DIY mitigation.
Call a professional if:
- Multiple rooms are affected
- Ceilings or walls are heavily saturated
- Water entered insulation or HVAC systems
- Mold growth is suspected
- Moisture persists despite drying efforts
Professional restoration teams use commercial-grade equipment and moisture mapping to prevent long-term issues.
Maintaining Temporary Roof Protection
A roof tarp is a temporary solution, not a permanent fix.
While it is in place:
- Inspect it visually after storms
- Watch for new interior leaks
- Remove debris that could weigh it down or puncture it
Plan permanent roof repairs as soon as conditions allow.
Preventing Future Roof Failures
While not all roof failures are preventable, risk can be reduced.
Preventive measures
- Schedule regular roof inspections
- Replace missing or damaged shingles promptly
- Keep gutters clear
- Trim overhanging tree branches
- Address flashing issues early
- Ensure proper attic ventilation
Proactive maintenance significantly reduces emergency water intrusion events.
Final Thoughts: Fast Action Makes the Difference
Preventing interior water damage after roof failure depends on speed, strategy, and proper temporary protection.
The most effective response follows a clear order:
- Ensure safety
- Stop incoming water at the roof
- Control interior exposure
- Dry affected areas aggressively
- Document damage
- Plan permanent repairs
A properly installed roof tarp can be the single most important step in preventing a manageable roof issue from becoming a full interior reconstruction. When handled correctly, temporary protection preserves structure, reduces repair costs, and protects what matters most inside the home.
FAQs
What should I do first if my roof fails during a storm?
Prioritize safety, shut off electricity near the leak, and stop incoming water using a roof tarp or emergency covering if conditions allow.
Can a roof tarp really prevent interior water damage?
Yes, when installed correctly, a roof tarp can block rain and wind-driven moisture and prevent additional interior damage until repairs are made.
How quickly does water damage spread inside a home?
Water damage can spread within minutes as moisture travels along framing, insulation, and drywall before becoming visible.
Is it safe to stay in a house with an active roof leak?
It can be unsafe if water is near electrical systems or ceilings are sagging; affected areas should be avoided until stabilized.
Should I try to drain a bulging ceiling?
Only if the area is stable and you can do so safely; otherwise, leave it to professionals to avoid injury from collapse.
How can I protect my floors from water damage?
Move rugs, elevate furniture legs, and use plastic sheeting to prevent moisture from soaking into flooring materials.
Will drying alone prevent mold growth?
Drying helps significantly, but saturated porous materials like insulation or carpet padding may still need removal to fully prevent mold.
How long can a roof tarp stay in place?
A roof tarp is temporary and should only remain until permanent roof repairs can be safely completed.
Should I document water damage before starting cleanup?
Yes, take photos and videos quickly, but do not delay emergency mitigation to prevent further damage.
When should I call a water damage restoration company?
Call professionals if multiple rooms are affected, moisture is hidden, or drying efforts are not reducing dampness.